3D Printing Fixes: Common Problems and Quick Solutions
3D printing has changed how we create things, letting people make everything from toys to tools right at home. But like any technology, 3D printers can be tricky sometimes. Don’t worry though – most printing problems have simple fixes that anyone can learn.
Whether you’re new to 3D printing or have been doing it for years, you’ve probably run into issues that made you want to pull your hair out. The good news is that most printer problems follow patterns, and once you know what to look for, troubleshooting becomes much easier.
This guide will walk you through the most common 3D printing problems and give you step-by-step solutions that actually work. We’ll cover everything from bed adhesion issues to filament jams, helping you get back to creating amazing prints.
Understanding Your 3D Printer Setup
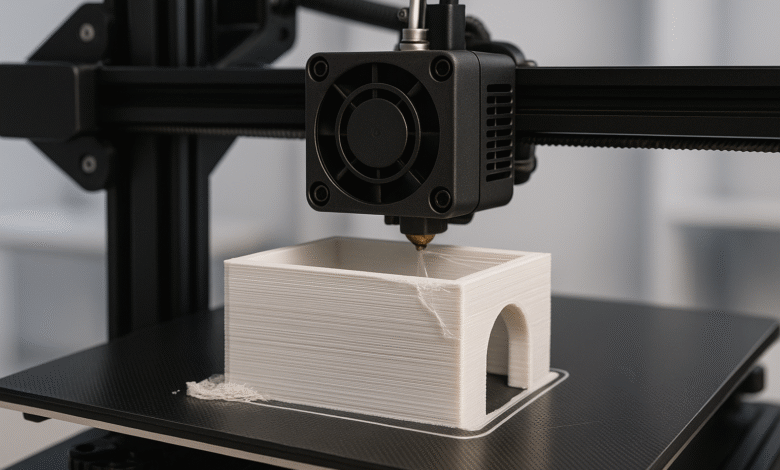
Before diving into specific fixes, it’s important to understand how your printer works. Most consumer 3D printers use a process called Fused Deposition Modeling (FDM), where heated plastic filament gets squeezed through a tiny nozzle and built up layer by layer.
The main parts you need to know about include the hot end (where filament melts), the build plate (where your print sits), the extruder (which feeds filament), and the cooling fans. When something goes wrong, it usually involves one of these components.
Regular maintenance prevents many problems before they start. Keep your printer clean, check that all screws are tight, and make sure your filament stays dry. A well-maintained printer will give you much better results and fewer headaches.
Bed Adhesion Problems and Solutions
One of the most frustrating issues is when your print won’t stick to the bed or comes loose partway through. This ruins your print and wastes time and material. Bed adhesion problems usually come down to three main factors: bed leveling, bed temperature, and surface preparation.


Fixing Bed Leveling Issues
Start by checking if your bed is level. Most printers have manual leveling screws at each corner. Heat up your bed and nozzle, then use a piece of paper to test the gap between the nozzle and bed at each corner. You should feel slight resistance when pulling the paper through, but it shouldn’t tear.
If your printer has auto-leveling, make sure it’s calibrated properly. Clean the sensor and check that it’s not loose. Sometimes auto-leveling systems need to be reset or recalibrated after moving the printer or changing components.
Temperature Settings for Better Adhesion
Bed temperature plays a huge role in adhesion. PLA typically needs a bed temperature around 60-70°C, while ABS requires 90-110°C. If your prints are curling at the corners, try increasing the bed temperature by 5-10 degrees.
First layer temperature is also crucial. Many people print the first layer 5-10 degrees hotter than the rest of the print. This helps the plastic flow better and stick to the bed more effectively.
Surface Preparation Methods
The build surface makes a big difference. Glass beds work great but often need help with adhesion. Try using a thin layer of glue stick, hairspray, or painter’s tape. For PEI surfaces, make sure they’re clean – use isopropyl alcohol to remove oils and residue.
Some filaments work better with specific surfaces. PETG loves PEI but can be tricky on glass. TPU (flexible filament) often prefers direct printing on glass with no adhesion aids.
Layer Adhesion and Print Quality Issues
When layers don’t stick together properly, your prints become weak and may split apart easily. This problem shows up as visible lines between layers or prints that break when handled.
Solving Poor Layer Adhesion
Temperature is usually the culprit here. If your nozzle temperature is too low, the plastic won’t be hot enough to bond well with the previous layer. Try increasing the temperature by 5-10 degrees and see if that helps.
Print speed also affects layer bonding. Printing too fast doesn’t give each layer enough time to properly fuse. Slow down your print speed, especially for the first few layers. Most materials print well at 30-60 mm/s for good layer adhesion.
Fixing Stringing and Oozing
Those annoying little plastic strings between parts of your print usually mean your retraction settings need work. Retraction pulls filament back into the nozzle when moving between print areas, preventing oozing.
Try increasing retraction distance by 0.5-1mm at a time until stringing improves. For direct drive extruders, start around 1-3mm. Bowden setups often need 4-8mm of retraction. Also increase retraction speed to 25-45 mm/s.
If stringing persists, lower your nozzle temperature by 5-degree increments. Some filaments are more prone to stringing at higher temperatures.
Clogged Nozzle Troubleshooting
A clogged nozzle is like a blocked pipe – nothing flows through properly. This shows up as inconsistent extrusion, missing layers, or no filament coming out at all.
Identifying Nozzle Clogs
Signs of a clogged nozzle include grinding sounds from the extruder, filament not coming out evenly, or gaps in your prints. Sometimes you’ll hear clicking sounds as the extruder tries to push filament through but can’t.
Clearing Nozzle Blockages
For minor clogs, try the cold pull method. Heat the nozzle to printing temperature, then insert filament and push it through manually. Let the nozzle cool to around 90°C, then quickly pull the filament out. This often removes debris stuck in the nozzle.
For stubborn clogs, use a thin needle or nozzle cleaning wire. Never use anything harder than brass on a brass nozzle, as you might damage the opening and change its shape.
Preventing Future Clogs
Keep filament dry and dust-free. Wet filament can cause steam bubbles that lead to clogs. Store filament in sealed containers with desiccant packets. Also, don’t let filament sit in a hot nozzle for extended periods without printing.
Warping and Curling Solutions
Warping happens when different parts of your print cool at different rates, causing stress that lifts corners or curves flat surfaces. It’s especially common with materials like ABS and PETG.
Understanding Why Warping Occurs
As plastic cools, it shrinks slightly. When the bottom layers are stuck to the bed but upper layers cool faster, tension builds up. This tension eventually overcomes the bed adhesion and lifts part of the print.
Effective Anti-Warping Techniques
An enclosure helps maintain consistent temperature around your print. Even a simple cardboard box can make a difference. This keeps the whole print warm and reduces rapid cooling that causes warping.
Brims and rafts provide more surface area for bed adhesion. A brim is a thin outline around your print base, while a raft is a platform printed underneath the object. Both give warping forces more area to overcome.
Environmental Controls
Keep your printer away from air conditioning vents, open windows, or fans that might create drafts. Sudden temperature changes are warping’s best friend. If possible, print in a room with stable temperature.
For materials prone to warping, consider upgrading to a heated chamber or building an enclosure around your printer. This investment pays off if you frequently print with ABS or other high-shrinkage materials.
Filament Feeding Problems
When filament doesn’t feed properly, your prints get gaps, weak spots, or stop extruding completely. These issues usually trace back to the extruder mechanism or filament path.
Extruder Motor Issues
If you hear grinding or clicking sounds, the extruder motor might be struggling. Check that the tension on the filament isn’t too tight or too loose. Too much tension can deform the filament, while too little lets it slip.
Clean the drive gear regularly. Plastic dust builds up in the teeth and reduces grip. Use a brass brush to remove debris, and make sure the gear isn’t worn down.
Filament Path Obstructions
Follow the filament path from the spool to the nozzle. Look for sharp bends, tight spots, or rough surfaces that might catch the filament. Bowden tubes can develop rough spots inside that grab filament – replace them if they feel rough when running filament through.
Make sure your spool can turn freely. A binding spool creates tension that makes feeding difficult. Some spool holders work better than others, so experiment with positioning.
Temperature Control and Calibration
Getting temperatures right is crucial for good prints. Too hot and you get stringing and overheating. Too cool and layers won’t bond properly.
Hot End Temperature Troubleshooting
If your printer shows temperature fluctuations, check the thermistor and heating cartridge connections. Loose connections cause temperature swings that ruin print quality.
PID tuning helps stabilize temperatures. This process teaches your printer’s controller how to maintain steady heat. Most firmware includes PID tuning commands that you can run through the printer’s interface.
Bed Temperature Consistency
Uneven bed heating creates adhesion problems in some areas while others stick too well. A glass bed helps distribute heat evenly. If you’re using a flexible bed, make sure it makes good contact with the heating element.
Consider upgrading to a thicker aluminum bed or adding an insulation layer underneath. This reduces heat loss and makes temperatures more consistent across the surface.
Print Speed and Quality Balance
Finding the right speed balance improves both print quality and success rates. Too fast causes quality issues, while too slow wastes time and might cause overheating.
Optimizing Speed Settings
Start with conservative speeds and work up. First layers should print slowly for good adhesion – around 20-30 mm/s works well. Outer perimeters benefit from slower speeds too, around 30-50 mm/s for clean surfaces.
Infill can print much faster since it’s hidden inside. Speeds of 60-100 mm/s often work fine for infill, depending on your printer and material.
Layer Height Considerations
Thinner layers take longer but look smoother. For draft prints or prototypes, 0.3mm layers save lots of time. For final prints or detailed models, 0.1-0.2mm layers give better results.
Match your layer height to your nozzle size. A 0.4mm nozzle works well with 0.2mm layers. Going too thin relative to nozzle size can cause flow problems.
Software and Slicer Settings
Your slicer software turns 3D models into instructions for your printer. Wrong settings here cause problems that no amount of hardware adjustment can fix.
Common Slicer Mistakes
Using someone else’s settings without adjustment rarely works perfectly. Every printer is different, even identical models. Start with recommended settings for your printer and material, then fine-tune based on results.
Support settings often need adjustment. Too little support causes drooping overhangs, while too much wastes material and leaves marks. Experiment with support density and interface layers.
Profile Optimization Tips
Create separate profiles for different materials and quality levels. This saves time and reduces errors. Label profiles clearly – “PLA_Fast_Draft” or “PETG_High_Quality” makes selection obvious.
Test new settings on small calibration prints before committing to long prints. A 20-minute test cube can save hours of wasted printing time.
Maintenance and Prevention
Regular maintenance prevents most 3D printing problems. A well-maintained printer runs more reliably and produces better results.
Regular Cleaning Routines
Clean the build surface after every few prints. Oil from your hands reduces adhesion over time. Use isopropyl alcohol for most surfaces, but check manufacturer recommendations.
Keep the printer interior clean. Plastic dust and debris can interfere with moving parts. A monthly cleaning prevents many mechanical problems.
Component Replacement Schedule
Nozzles wear out gradually. If you notice decreasing print quality that cleaning doesn’t fix, try a new nozzle. They’re inexpensive and make a big difference when worn.
Bowden tubes get rough inside and should be replaced annually with regular use. Hot end fans are critical for cooling – replace them at the first sign of noise or reduced airflow.
Advanced Troubleshooting Techniques
Some problems need more detailed diagnosis. These techniques help identify issues that aren’t immediately obvious.
Systematic Problem Diagnosis
When facing a new problem, change only one variable at a time. If you adjust temperature, speed, and bed leveling all at once, you won’t know which change fixed the issue.
Keep notes about what works and what doesn’t. This builds your troubleshooting knowledge and helps solve similar problems faster in the future.
Testing and Calibration Prints
Print calibration objects regularly. Temperature towers help find optimal temperatures, while retraction tests dial in stringing settings. These small prints save material while optimizing settings.
Benchy (the small boat model) is popular because it tests many printer capabilities in one print. Overhangs, bridges, fine details, and curved surfaces all appear in this single model.
Conclusion
Most 3D printing fixes aren’t complicated once you understand what’s happening. The key is systematic troubleshooting – change one thing at a time and test the results. Keep your printer clean and well-maintained, and many problems won’t happen at all.
Remember that 3D printing involves many variables working together. Temperature, speed, adhesion, and material quality all affect your results. When something goes wrong, step back and consider which factor is most likely causing the problem.
Don’t get discouraged by failed prints – every experienced 3D printer user has faced these same issues. Each problem you solve makes you better at diagnosing and fixing future issues. With patience and practice, you’ll develop the skills to handle almost any printing challenge that comes your way.
The 3D printing community is incredibly helpful, so don’t hesitate to ask for advice when stuck. Forums, social media groups, and local maker spaces are full of people willing to share their troubleshooting experience. Happy printing!