Creating a visually stunning poster doesn’t require expensive design software or years of experience. Canva’s poster maker has democratized graphic design, allowing anyone to produce professional-quality posters in minutes. Whether you’re promoting an event, advertising a business, or decorating your office space, learning how to make a poster in Canva is an invaluable skill that saves time and money.
In 2025, Canva continues to evolve with AI-powered tools and intuitive features that make poster design accessible to complete beginners while offering depth for experienced creatives. This guide walks you through everything you need to know about creating posters in Canva, from selecting the perfect template to customizing colors, fonts, and images, and exporting a print-ready final product.
Whether you’re working with the free version or Canva Pro, you’ll discover practical techniques that elevate your poster from basic to brilliant. By the end of this article, you’ll have the confidence and knowledge to design a poster that captures attention and communicates your message effectively.
Getting Started: Your First Steps to Poster Design
Creating a Canva Account
Before you can start making posters, you’ll need a Canva account. Head to canva.com and sign up using your email, Google, or Facebook account.
The good news is that Canva’s free version includes everything you need to design a poster with professional results. While Canva Pro offers premium templates and additional features, beginners can accomplish amazing work without a paid subscription.
Choosing Between Templates and Blank Canvas
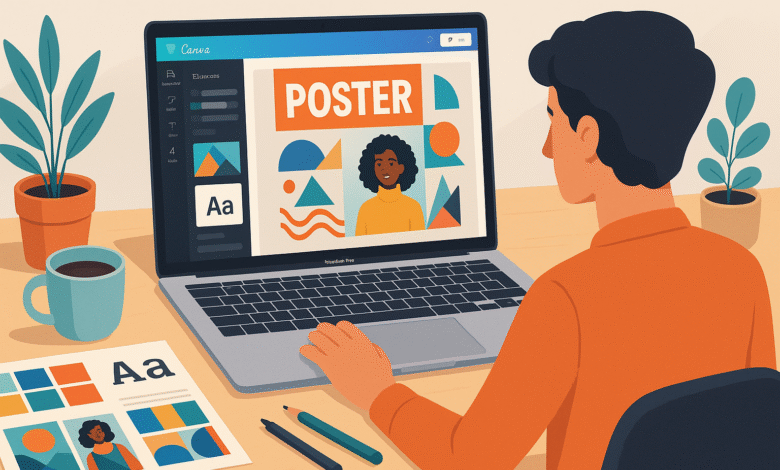
Once logged in, click “Create a design” and select “Poster” from the dropdown menu. You’ll immediately face a decision: start with a poster template or begin with a blank canvas. For most users, using poster templates is the smarter choice.
Templates provide a pre-built layout, color coordination, and font pairings that work harmoniously together. If you search for “posters” or a specific event type like “yard sale” or “concert,” Canva displays hundreds of options. Watch for the small crown icon in the corner—that marks Pro-exclusive templates.


For free users, simply choose templates without that crown symbol.
Mastering Poster Templates and Customization
Selecting the Right Template for Your Purpose
The foundation of a great poster starts with template selection. Consider your poster’s purpose: Is it for an event, business promotion, social media, or general awareness? Poster templates in Canva are organized by use case, making it easy to narrow your options.
A well-chosen template provides built-in visual hierarchy, meaning the most important information is already positioned prominently. This saves you from making design mistakes that amateur designers often make, like overwhelming viewers with too much text or poor spacing.
Editing Text and Content
Double-click any text box to edit its content. Replace placeholder text with your information, keeping these principles in mind:
- Main headlines should be large, bold, and positioned where eyes naturally land (typically the top or center)
- Secondary information like dates, times, or locations should be smaller but still legible from a distance
- Supporting details (fine print, disclaimers) belong in the smallest font size
- Limit your poster to three or fewer font sizes to maintain clarity
When working with text customization in Canva, remember that readability trumps creativity. A beautiful font that’s hard to read defeats the poster’s purpose.
Design Fundamentals: Color, Typography, and Visual Hierarchy
Building an Effective Color Scheme
Your poster’s colors communicate mood and grab attention. Creating a color scheme in Canva is straightforward—either use the built-in color options or explore complementary color combinations. A helpful tip: visit canva.com/colors to access the color wheel tool.
This lets you generate harmonious color combinations by dragging around the color wheel and copying HEX codes directly into your design. Remember these color principles:
- Use high contrast between text and background for readability
- Limit yourself to two to three primary colors plus neutral tones
- Consider what colors evoke the right emotion for your message
- Test your color choices from a distance to ensure visibility
Typography: Choosing and Combining Fonts
Typography makes or breaks poster design. Font selection should never be random—each font should serve a purpose. Typically, you’ll use:
- Display font for your main heading (serif or bold sans-serif)
- Body font for event details and key information (clean, legible sans-serif)
- Accent font (optional) for small highlights or special text
Canva’s extensive font library includes thousands of options, but resist the urge to use too many. When you’ve chosen a font you love, click the three-dot menu next to it to see similar fonts from the same artist or collection. This ensures visual cohesion and makes finding complementary typefaces easier.
Creating Visual Hierarchy
Visual hierarchy guides viewers’ eyes to the most important information first. Achieve this through:
- Size variation (larger elements grab attention first)
- Color contrast (bright or bold colors stand out)
- Positioning (top and center attract more focus)
- Whitespace (breathing room makes content feel less cluttered)
Working with Images and Graphics
Adding and Customizing Images
Professional posters combine compelling text with relevant imagery. To add images, click “Uploads” and choose files from your computer, then drag them onto your poster. You can resize, crop, and reposition images within frames. Double-click an image to access cropping tools and zoom controls. For best results, use high-quality images that directly relate to your poster’s message.
Canva also integrates with Pexels and Pixabay (even on the free plan), giving you access to millions of free stock photos. Simply click “More” in the left sidebar and search these libraries for professional images without licensing concerns.
Using Elements, Shapes, and Icons
Beyond photos, Canva’s Elements tab provides shapes, icons, and decorative graphics. These visual additions break up text-heavy areas and reinforce your message.
For example, if you’re creating an event poster, small icons representing key features help convey information quickly. Use elements strategically—overcrowding dilutes your message’s impact.
Leveraging AI-Powered Tools
Canva’s 2025 features include AI-assisted image enhancements. You can remove backgrounds with a single click, upscale low-quality images, remove unwanted elements, and apply auto-color correction. These tools help transform basic images into polished poster elements without requiring external editing software.
Advanced Poster Design Techniques
Organizing Elements with Grids and Frames
For posters featuring multiple images (like product showcases or event galleries), using grids ensures professional alignment. Grids arrange images in equal sizes and spacing, while frames can hold images in custom shapes. If you’re creating a collage-style poster, grids eliminate manual alignment headaches.
Positioning and Alignment for Perfect Layout
Canva includes alignment tools that make positioning elements effortless. Select multiple elements and use the alignment menu to center them, arrange them vertically or horizontally, or distribute them evenly. The “Tidy Up” feature is particularly helpful—it automatically aligns and balances your design elements, saving time and ensuring professional results.
Adding Text Effects and Overlays
Instead of placing shapes behind text, use Canva’s text effects. Click your text, go to “Effects,” and select “Background.” You can adjust corner radius, transparency, and padding. This creates polished separation between text and background without cluttering your canvas.
Also Read: How to Design a Digital Workplace in 2025: Tips and Strategies
Exporting and Printing Your Poster
Choosing the Right File Format
Before downloading, select the appropriate file format for your needs. PDF Print is ideal for professional printing—it preserves resolution and supports crop marks and bleed settings. For digital sharing, PNG or JPEG work well. SVG format is best for web use, offering scalability without quality loss.
Setting Export Parameters
For physical posters, follow these export steps:
- Click “Download”
- Select “PDF – Print” as your file type
- Check “Crop Marks & Bleed” (ensures your design prints to the edge without being cut off)
- Set color profile to CMYK (essential for professional printing)
- Choose your page size based on your intended poster dimensions
Printing Options and Poster Sizes
Canva supports various poster sizes: A0 (for large-scale retail signage), A1 (local promotions), A2 (versatile promotional displays), and custom sizes up to 52″ x 52″. After downloading, you can print through local vendors or use services like Printed.com, which integrates with Canva for seamless ordering.
Essential Tips for Creating Professional Posters
Applying the Rule of Thirds
Professional designers use the rule of thirds for visual balance. Imagine dividing your poster into nine equal sections with two horizontal and two vertical lines. Place key elements along these lines rather than dead center—this creates more dynamic, visually interesting compositions.
Managing Whitespace Effectively
Empty space (whitespace) isn’t wasted space—it’s essential to design clarity. Overcrowded posters overwhelm viewers and obscure your message. Allow breathing room around text and images. Simplicity and clarity should guide every design decision.
Creating a Clear Call-to-Action
Every poster needs direction. Whether it’s “Visit Our Website,” “Call Now,” or “Shop Today,” make your call-to-action prominent and easy to find. Position it where eyes naturally travel (typically lower right for Western audiences) and use contrasting colors to ensure visibility.
Using Brand Consistency
If designing multiple posters for the same organization, create or use a Brand Kit. This feature stores your logo, brand colors, and preferred fonts, allowing instant application across all designs. Consistent branding strengthens recognition and professionalism.
Leveraging Canva Pro Features for Enhanced Results
While free Canva creates excellent posters, Canva Pro ($13/month) offers notable advantages. Pro members access premium templates, millions of stock images, background removal tools, and the Magic Resize feature for converting one design into multiple sizes instantly.
The Background Remover alone justifies the investment for serious poster creators—it replaces time-consuming manual editing.
For collaborative projects, invite team members to edit your poster in real-time. Leave comments, suggest changes, and design together from any device. This feature works on both free and Pro plans, though Pro users enjoy additional collaboration tools.
Common Poster Design Mistakes to Avoid
Several pitfalls plague amateur poster designers. First, avoid cluttered layouts. Too many elements, colors, or fonts create visual chaos.
Second, don’t prioritize aesthetics over clarity—a beautiful poster that nobody understands fails its purpose. Third, skip trendy fonts that may look dated in months. Finally, always proofread text before finalizing—typos destroy credibility instantly.
Learning More: Official Canva Resources
For deeper learning, explore Canva Design School’s poster tutorial, which offers video guides on template selection, font choice, image positioning, and color theory. Additionally, Canva’s comprehensive design guide covers event-specific poster strategies, typography best practices, and visual hierarchy principles.
Conclusion
Creating a professional poster in Canva 2025 is remarkably straightforward when you understand design fundamentals and leverage the platform’s powerful features. Whether you’re starting with a template or building from scratch, success depends on clarity, simplicity, and intentional design choices.
Focus on strong visual hierarchy through varied font sizes and colors, use relevant imagery that reinforces your message, and always prioritize readability over decoration. R
emember that whitespace is your friend, and three or fewer fonts and two to three colors create more impactful designs than elaborate alternatives. By applying these techniques—from template selection and text customization to color coordination and export optimization—anyone can produce stunning posters that capture attention and communicate effectively.
The combination of Canva’s intuitive interface, extensive template library, and increasingly sophisticated AI tools means professional-quality poster design is now accessible to everyone, regardless of design experience. Start with a template today, follow this guide’s principles, and watch your poster creations transform from basic to brilliant.